
Introduction
If you are starting your journey in version control or software development, learning how to create a GitHub repository is one of the most important first steps. GitHub is the backbone of modern code collaboration, open source projects, and real world development workflows.
In this GitHub beginners guide, you will learn how to set up your first repository using simple, clear steps. Whether you are a student, developer, or someone exploring tech without coding experience, this guide will help you understand GitHub basics, repositories, branches, and how everything fits together.
Table of Contents
- What is GitHub and Why It Matters
- Understanding GitHub Repositories
- How to Create a GitHub Repository Step by Step
- Setting Repository Visibility Public vs Private
- Creating Branches in GitHub
- Managing Repository Settings and Collaboration
- Common Beginner Mistakes
- FAQ
- Conclusion
What is GitHub and Why It Matters
GitHub is a platform built around Git, a version control system that tracks changes in your code over time. It allows teams and individuals to manage projects, collaborate, and maintain history safely.
In simple terms, GitHub stores your projects in repositories. These repositories help you organize files, track updates through commits, and manage changes using branches.
For beginners, understanding this is key to using GitHub effectively:
- Git tracks changes
- GitHub stores and shares your projects
- Repositories hold your project files
This foundation is essential for anyone following a GitHub tutorial for beginners or a beginner guide to Git and GitHub.
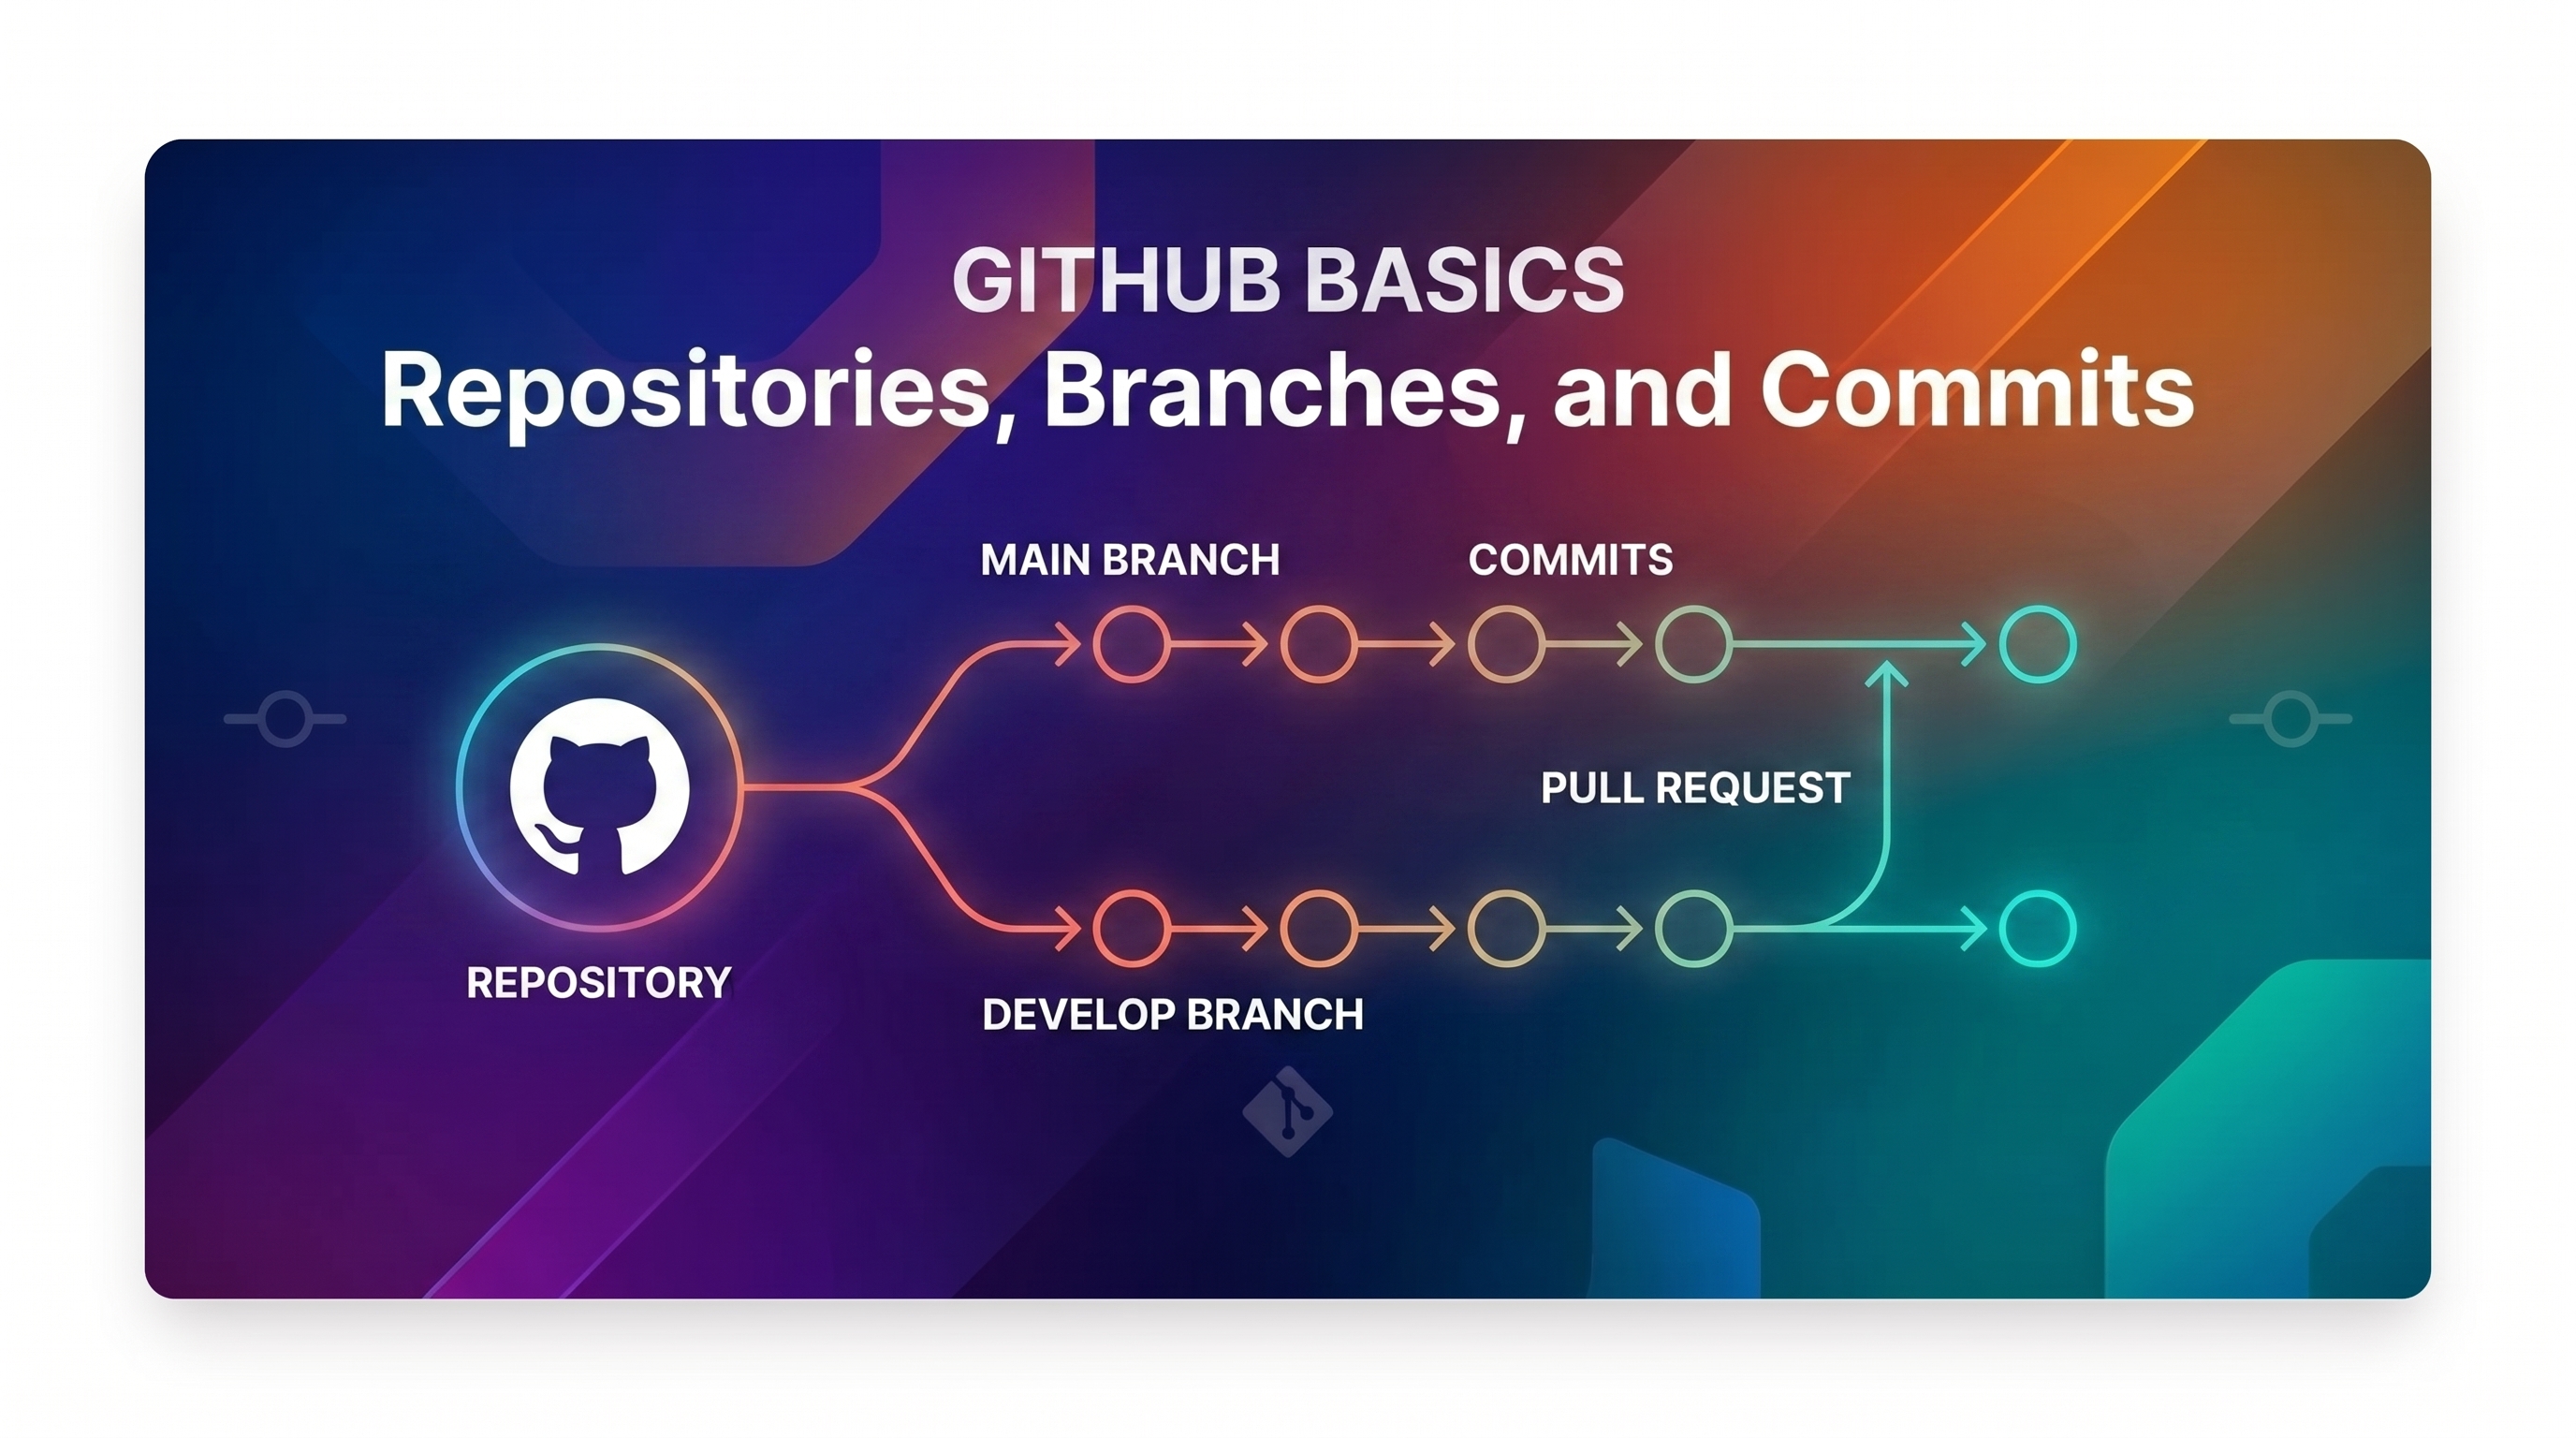
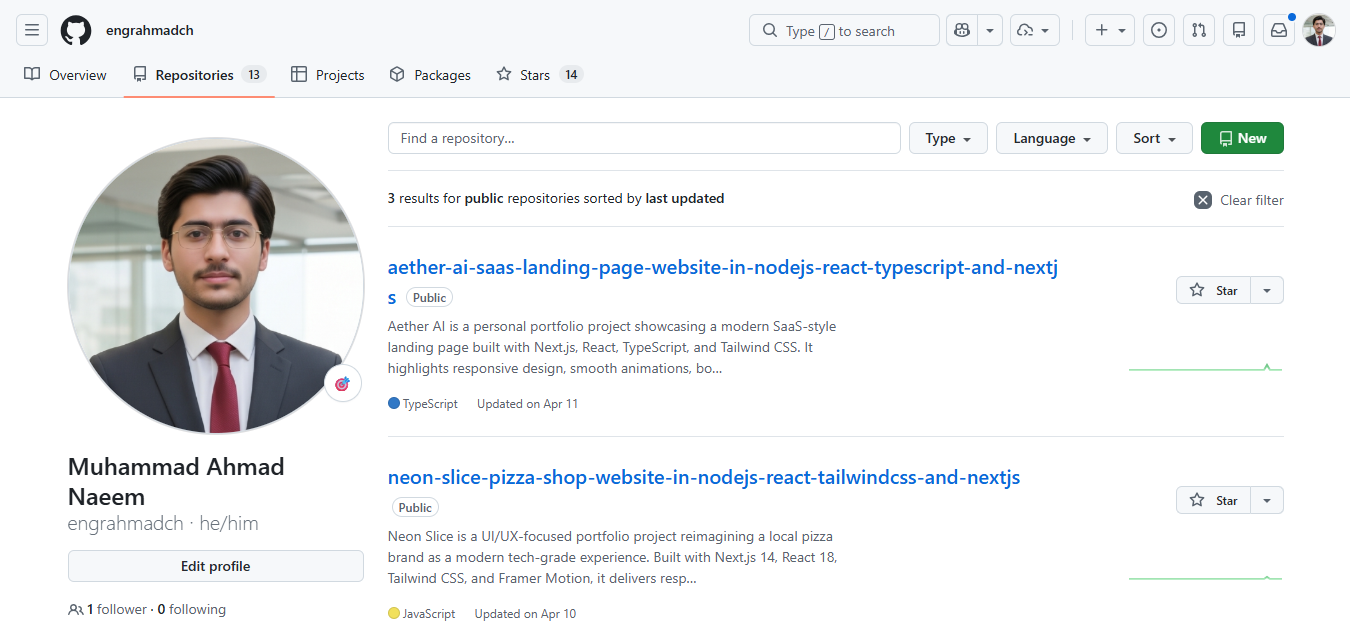
Understanding GitHub Repositories
A repository, often called a repo, is your project folder on GitHub. It contains all your files, folders, and version history.
Think of it as the central hub of your project.
Each repository includes:
- Project files
- Version history
- Branches for development
- Collaboration tools like pull requests
In a GitHub beginner tutorial, repositories are usually the first concept you learn because everything revolves around them.
Types of repositories:
- Public repositories: visible to everyone
- Private repositories: restricted access
Repositories are the foundation of any software development workflow and essential for both personal and team projects.
How to Create a GitHub Repository Step by Step
Now let’s walk through the exact process of how to create a GitHub repository using the GitHub web interface.
Step 1: Sign in to GitHub
Visit the official GitHub website and log in to your account. If you don’t have one, create a free account first.
This is part of any GitHub setup guide for beginners.
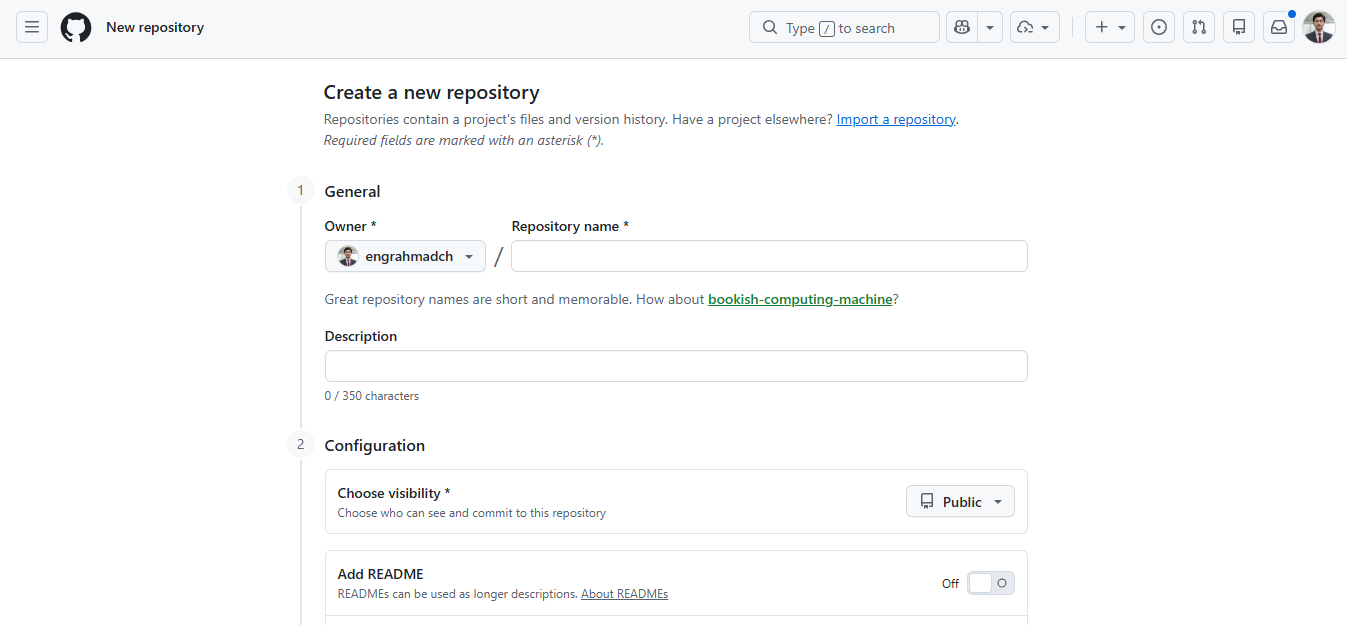
Step 2: Click the New Repository Button
Once logged in:
- Click the plus icon at the top right
- Select "New repository"
This is the starting point in every GitHub step by step guide.
Step 3: Choose a Repository Name
Enter a clear and meaningful name.
Example:
- portfolio-website
- python-data-project
Good naming helps in long term project organization and collaboration.
Step 4: Add a Description
Write a short description explaining what the project is about.
This helps others understand your project in open source environments.
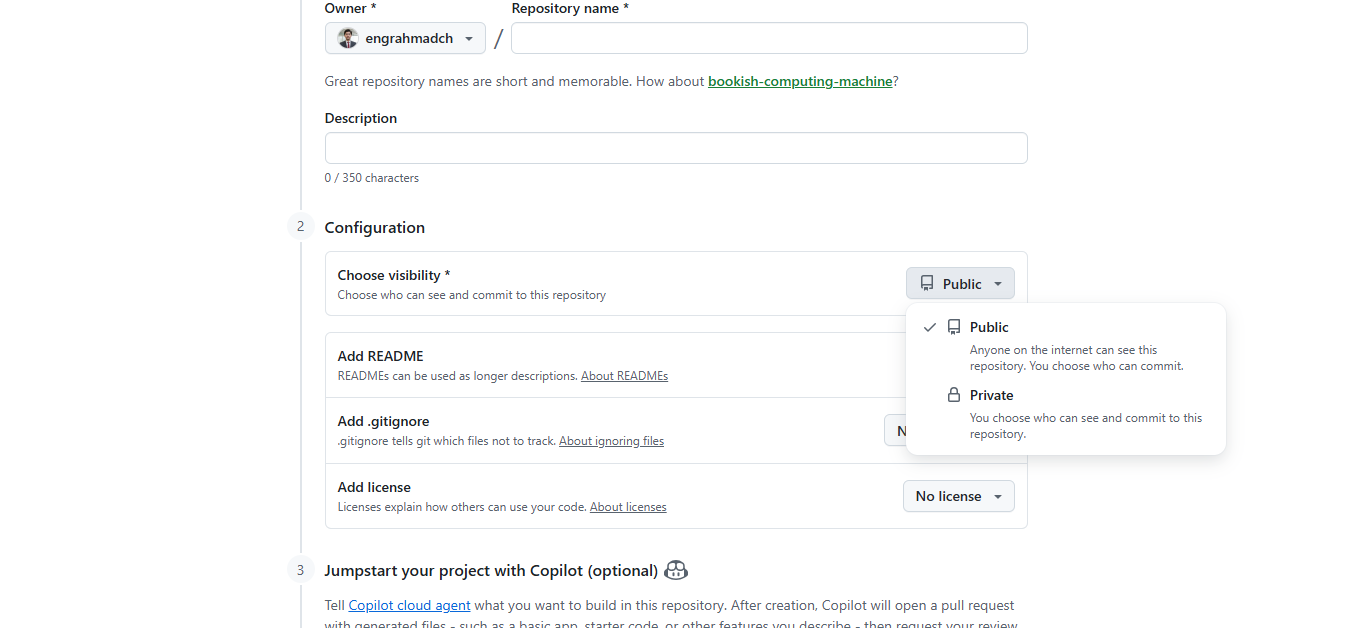
Step 5: Choose Public or Private
You will choose between:
- Public: visible to everyone
- Private: restricted access
This setting can be changed later if needed.
Step 6: Initialize the Repository
You can optionally:
- Add a README file
- Add a .gitignore file
- Choose a license
For beginners, adding a README is highly recommended.
Step 7: Create Repository
Click the "Create repository" button.
That’s it. You now have your first GitHub repository.
This process forms the core of a GitHub crash course and is one of the most important skills in GitHub basics for developers.
Setting Repository Visibility Public vs Private
Choosing the right visibility is important.
Public Repository
- Anyone can view your project
- Ideal for open source and portfolios
- Great for learning and sharing
Private Repository
- Only invited collaborators can access
- Best for personal or confidential work
If you are wondering how to make a GitHub repository public or private, you can change this anytime in repository settings.
Understanding visibility is important in any GitHub practical tutorial and helps beginners avoid mistakes.
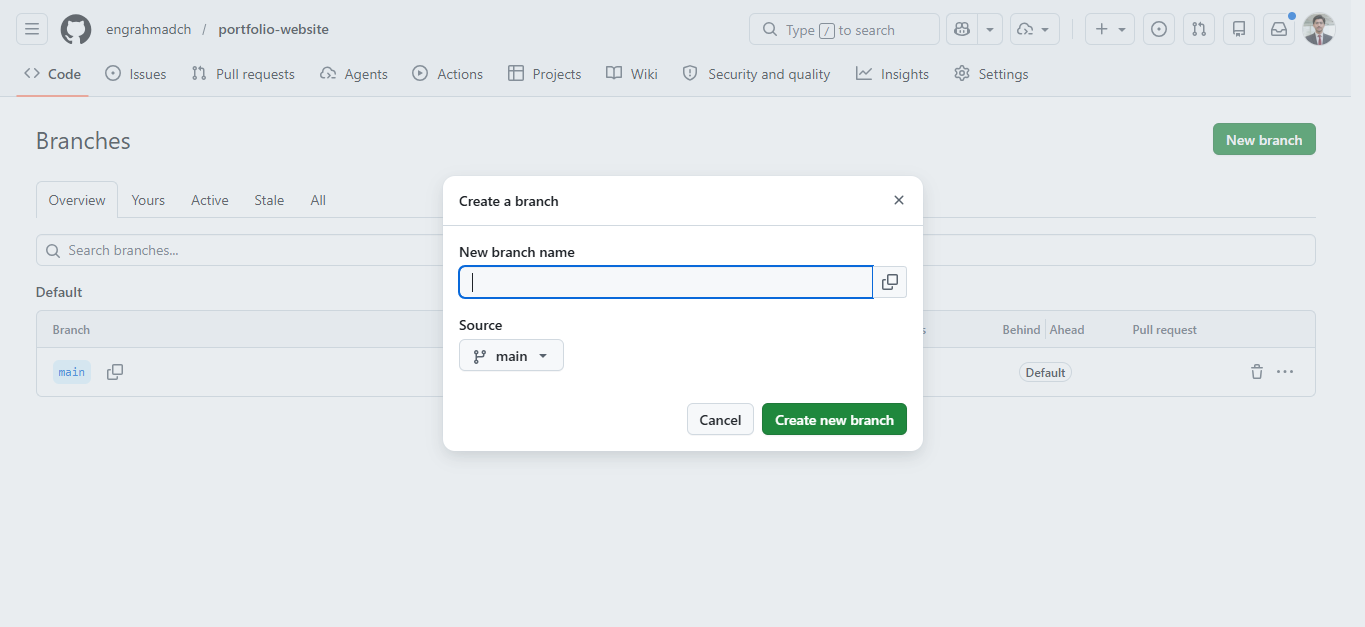
Creating Branches in GitHub
Branches allow you to work on different versions of your project without affecting the main version.
Why Branches Matter
- Safe experimentation
- Organized development
- Team collaboration
How to Create a Branch on GitHub
- Open your repository
- Click the branch menu
- Type a new branch name
- Click create
This is essential knowledge for anyone learning GitHub workflow for beginners.
Branches are also used for pull requests, where changes are reviewed before merging.
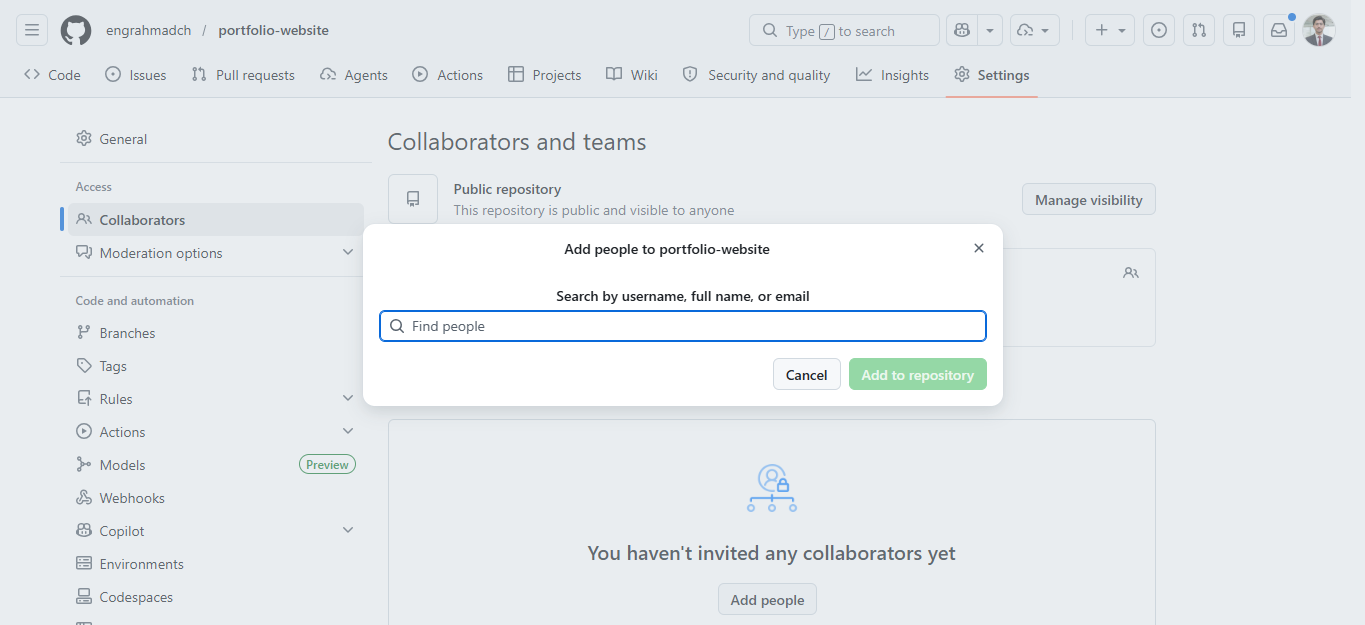
Managing Repository Settings and Collaboration
Once your repository is created, you can manage it effectively.
Add Collaborators
You can invite others to contribute:
- Go to repository settings
- Select access or collaborators
- Add users
This is how code collaboration happens on GitHub.
Useful Features
- Issues for tracking tasks
- Pull requests for reviewing changes
- Commit history for tracking updates
If you are learning GitHub explained simply, think of these as tools to manage work and teamwork.
Internal Linking Opportunity
You can later create related articles such as:
- "How to push code to GitHub"
- "How to clone a repository in GitHub"
- "GitHub Desktop tutorial for beginners"
These topics naturally support this guide.
Common Beginner Mistakes
Many beginners make simple mistakes when learning GitHub.
1. Poor Repository Naming
Using names like "test123" makes projects hard to understand later.
2. Not Adding a README
README files help explain your project clearly.
3. Wrong Visibility Settings
Accidentally making private repositories public or vice versa.
4. Not Using Branches
Working only in the main branch increases risk.
5. Ignoring Structure
Organizing files properly improves project quality.
Avoiding these issues will help you learn GitHub fast and build better projects.
FAQ Section
What is a GitHub repository?
Is GitHub free to use?
Can beginners use GitHub without coding experience?
How do I make a repository private?
What is the difference between Git and GitHub?
What are branches in GitHub?
Why should I create a repository?
Conclusion
Learning how to create a GitHub repository is the first step in mastering GitHub and modern development workflows. Once you understand repositories, you unlock the ability to manage projects, collaborate with others, and participate in open source.
This complete GitHub beginners guide showed you how to create a repository, manage visibility, and set up branches. These basics form the foundation for everything else you will do on GitHub.
Start with one repository today and build your confidence gradually. The more you practice, the faster you will learn GitHub and become comfortable with real world version control systems.